- Thu Jun 08, 2017 3:38 pm
#9528
 generate_discord_bot_token_clientid.gif (1.23 MiB) Viewed 602415 times
Updated instructions: 10.10.2022
HOW TO CONNECT TO A DISCORD SERVER?
 generate_discord_bot_token_clientid_10_2022.gif (7.75 MiB) Viewed 429338 times
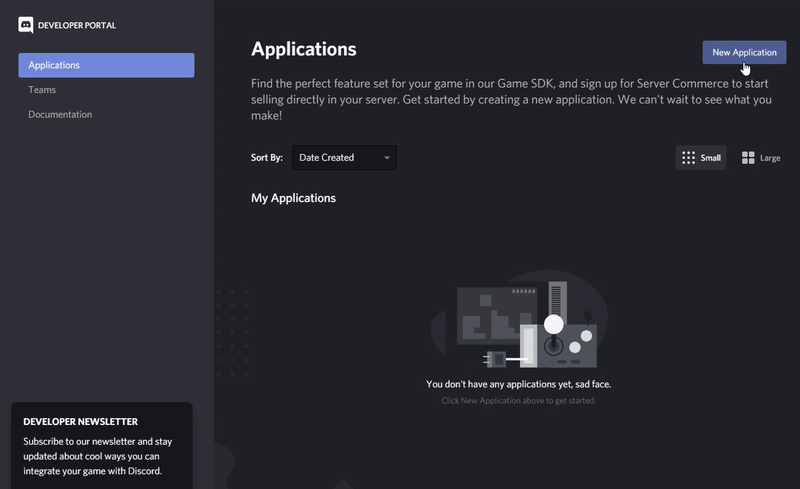
Step 1 [CREATING A DISCORD APPLICATION]:
generate_discord_bot_token_clientid_10_2022.gif (7.75 MiB) Viewed 429338 times
Step 1 [CREATING A DISCORD APPLICATION]:
Visit this LINK and login with your Discord account to create a Discord application.
- Click the "New Application" Button.
- Give your Bot a cool name (can be changed later).
- Click the "Create" button.
- Select a profile image (optional, you can skip this).
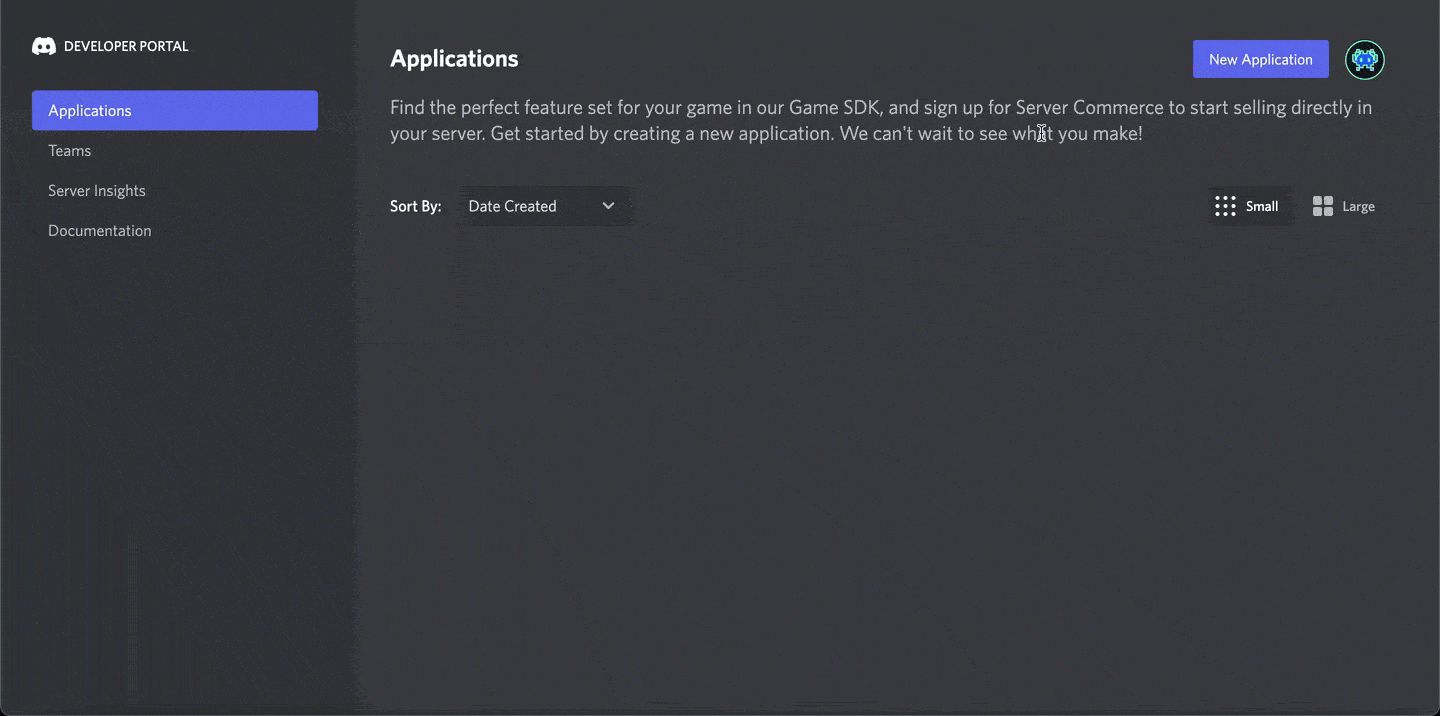
Step 2 [GETTING APPLICATION ID AND TOKEN]:
- Copy the shown Application ID.
- On the left menu navigate to "Bot" Click the "Add Bot" button and accept.
- Reset (to create) a new BOT Token and copy it.
- Make sure you disable public bot. (you create your own private bot which is not shared with anyone else!)
- Make sure you enable presence intent.
- Make sure you enable server members intent.
- Make sure you enable message content intent. (otherwise chat commands won't work!)
- Click the "Save Changes" button!
Step 3 [INVITE THE BOT APPLICATION TO YOUR SERVER]:
Now you have to invite your BOT to your Discord server.
 invite_discord_bot_10_2022.gif (1.61 MiB) Viewed 429342 times
Use this invite link and replace "YOUR_APPLICATION_ID_HERE" with your created APPLICATION ID you copied in step 2:
Step 4 [SAVE TOKEN + APPLICATION ID TO YOUR TS3MUSICBOT]:
For a private license purchased on ts3musicbot.net (if you run the software yourself):
The private license has a form to save the Discord BOT Token and Client ID (up to 6). The Discord TS3MusicBots, if you use 6 bots, they will be limited to connect to 1 Discord Server. If you want to connect multiple TS3MusicBots to multiple Discord servers, please use the commercial licenses.
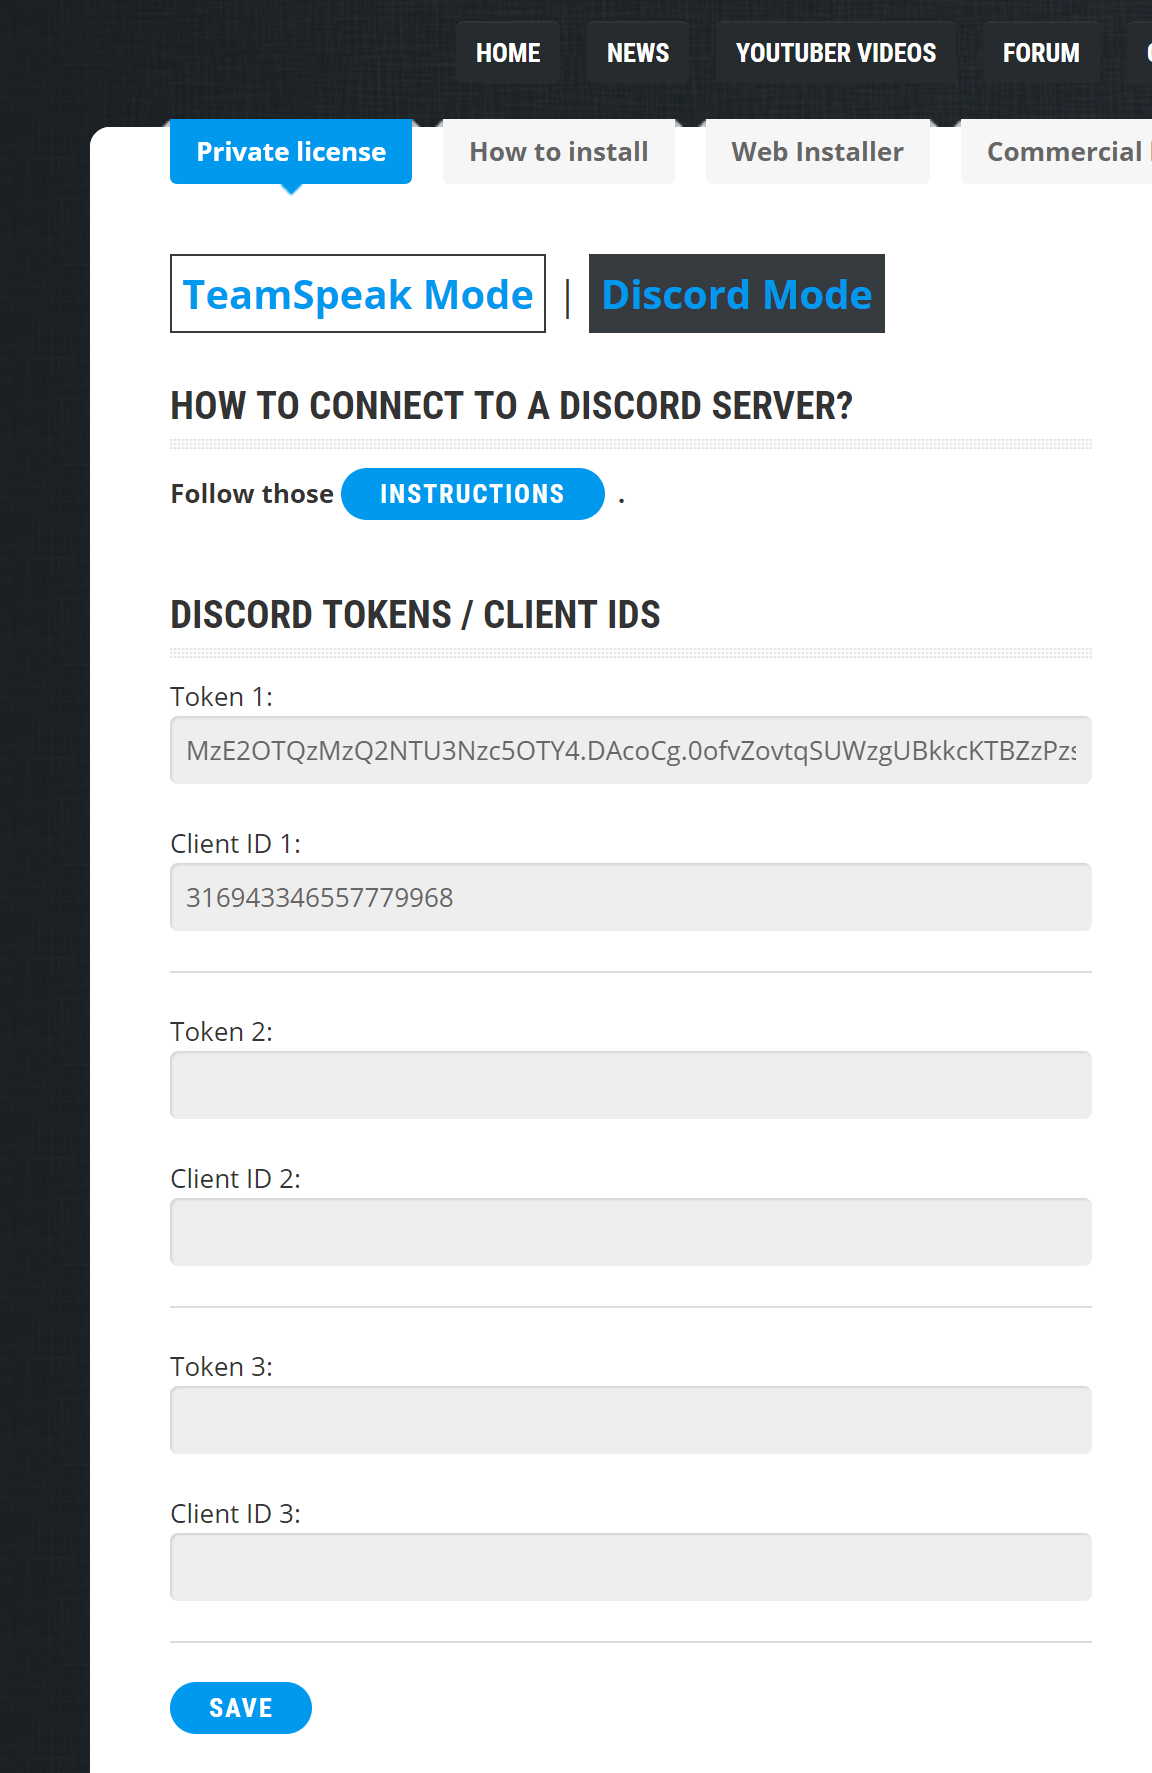 TS3MusicBot_private_license_discord_token_form.PNG (255.61 KiB) Viewed 631943 times
For a commercial license purchased from ts3musicbot.net or if you rent your bot from a hosting partner (reseller):
For teamspeak servers, we normally save "IP:PORT" as a target address.
To let the TS3MusicBot connect to a Discord server, we will save "BOT_TOKEN:APPLICATION_ID" instead of the "IP:PORT".
In our example it would be:
HOW TO CONNECT TO A DISCORD SERVER?
Visit this LINK and login with your Discord account to create a Discord application.
- Click the "New Application" Button.
- Give your Bot a cool name (can be changed later).
- Click the "Create" button.
- Select a profile image (optional, you can skip this).
Step 2 [GETTING APPLICATION ID AND TOKEN]:
- Copy the shown Application ID.
- On the left menu navigate to "Bot" Click the "Add Bot" button and accept.
- Reset (to create) a new BOT Token and copy it.
- Make sure you disable public bot. (you create your own private bot which is not shared with anyone else!)
- Make sure you enable presence intent.
- Make sure you enable server members intent.
- Make sure you enable message content intent. (otherwise chat commands won't work!)
- Click the "Save Changes" button!
Step 3 [INVITE THE BOT APPLICATION TO YOUR SERVER]:
Now you have to invite your BOT to your Discord server.
Use this invite link and replace "YOUR_APPLICATION_ID_HERE" with your created APPLICATION ID you copied in step 2:
Code: Select all
And invite your created BOT to your Discord server. https://discord.com/oauth2/authorize?permissions=0&scope=bot&client_id=YOUR_APPLICATION_ID_HEREStep 4 [SAVE TOKEN + APPLICATION ID TO YOUR TS3MUSICBOT]:
For a private license purchased on ts3musicbot.net (if you run the software yourself):
The private license has a form to save the Discord BOT Token and Client ID (up to 6). The Discord TS3MusicBots, if you use 6 bots, they will be limited to connect to 1 Discord Server. If you want to connect multiple TS3MusicBots to multiple Discord servers, please use the commercial licenses.
For a commercial license purchased from ts3musicbot.net or if you rent your bot from a hosting partner (reseller):
For teamspeak servers, we normally save "IP:PORT" as a target address.
To let the TS3MusicBot connect to a Discord server, we will save "BOT_TOKEN:APPLICATION_ID" instead of the "IP:PORT".
In our example it would be:
Code: Select all
Now you can start your TS3MusicBot and it will connect to your discord server!MzE2OTQzMzQ2NTU3Nzc5OTY4.DAcoCg.0ofvZovtqSUWzgUBkkcKTBZzPzs:316943346557779968 - By oliviasmith007
 - By Mulano77